If you have Express APIs you are not alone. But have you ever considered shifting this server based API model to a serverless one? Stick with me and this by the end of this article you'll see how to do it and have a working example to try for yourself.
Update: Try everything you see in this article in this hands-on tutorial
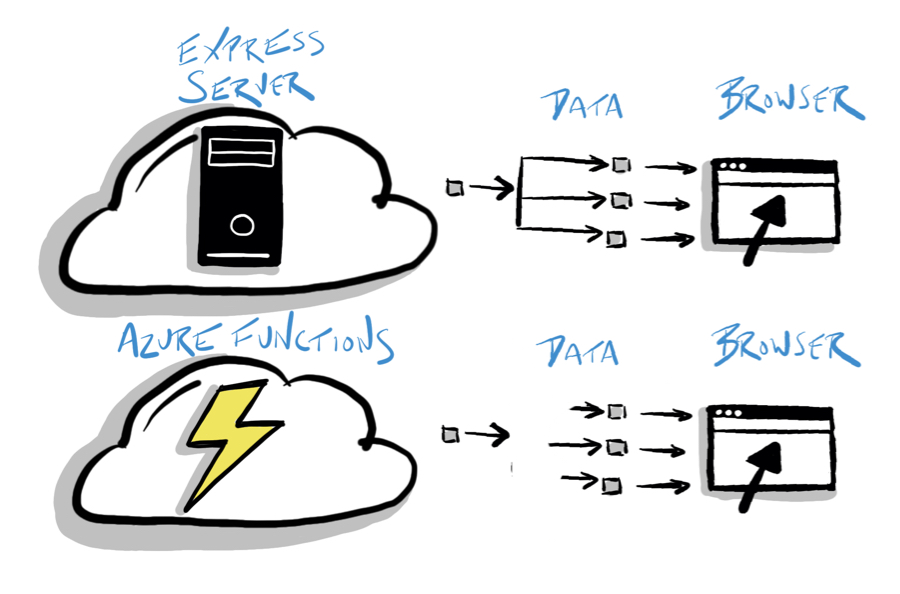
I love Node and Express for creating APIs! However, these require a server and paying for that server in the cloud. Shifting to serverless alleviates the cost, the server upkeep, helps scale up and down easily, and reduces the surface area of the middleware required for a robust Express app. Is it perfect? No, of course not! But this is a solid option if these factors affect you. You'll learn how to shift your Node Express APIs to Serverless Functions in this article.
What You'll Learn
We'll start by exploring and running the Node and Express APIs in the sample project. Then we'll walk through creating an Azure Functions app followed by refactoring the Express routes and data calls to the Azure Functions app. Finally, we'll explore the results together. Through this you'll learn to:
- create an Azure Function app
- refactor existing Express APIs to Azure Functions
- understand the differences between the approaches
While this article walks through the steps to shift your APIs from Express to Azure Functions, you can also follow along with the completed sample project on GitHub.
We'll walk through the code and the steps together, and at the end I share links to everything you need to get started and try this for yourself.
Planning the Shift to Serverless
Before shifting the app to serverless, let's think about why we might want to do this and what effort it might take to perform the shift.
First, the Express app requires a server which you must configure and maintain. It would be nice to alleviate some of this effort and cost.
Express apps often have a long list of middleware and logic to start the server. This sample project has a minimal amount of middleware, but you'd certainly want more in a production app with more concerns (ex: security) and features (ex: logging). While Azure Functions don't make this go away entirely, there is less logic and less code to start Azure Functions. Often there is very little code and some configuration. What does this mean in a concrete example? Well, for this sample app the server.ts file effectively goes away.
So why make this shift? Overall there is less to think about with serverless.
About the Sample Project
What's in the sample project on GitHub that you'll learn about in this article? Great question!
The project represents a simple Node Express APIs app in TypeScript that is shifted to Azure Functions.
But what if you aren't using TypeScript? That's fine. If your Express app is using JavaScript, feel free to shift it to Azure Functions using JavaScript.
The client app is Angular, however it could just as easily be Vue or React. The heroes and villains theme is used throughout the app.
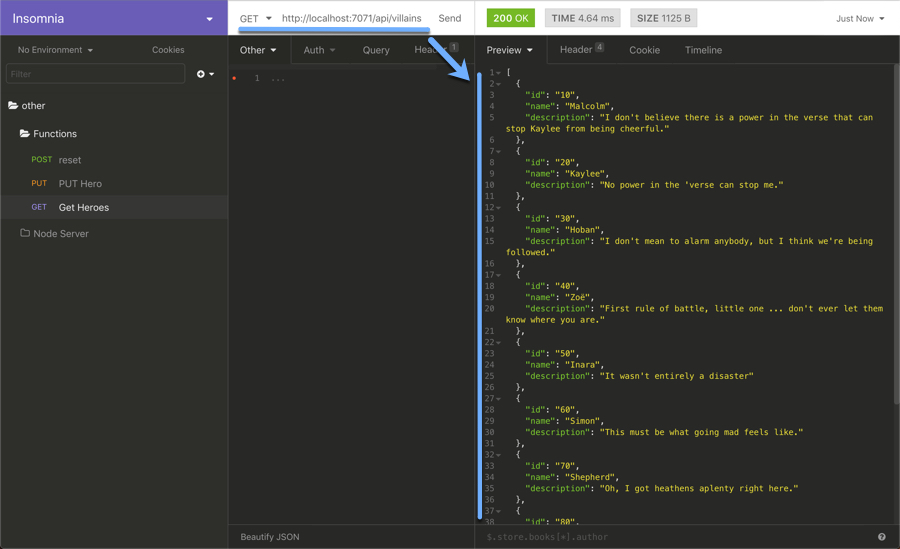
While we will use an Angular app, one of the great things about Azure Functions is that you can run it locally on you computer, debug it, and call HTTP functions using tools like a browser, Postman, Insomnia (as shown below).
Getting Started
Let's start by getting the code and setting up the development environment. Follow these steps to prepare the code.
- Clone this repository
- Install the npm packages
- Build the Node Express and the Angular code
git clone https://github.com/johnpapa/express-to-functions.git
cd express-to-functions
npm install
npm run node-ng:build
Make a copy of the env.example file named .env, in the root of the project. It should contain the following code.
.env
NODE_ENV=development
PORT=7070
WWW=./
Environment Variables: Applications may have very important environment variables located in the root in .env file. This file is not checked into GitHub because it may contain sensitive information.
Now our code is ready for us to use it. But before we do, let's take a step back and see what we have.
Node and Express APIs
Now let's explore the sample project on GitHub.
This is a conventional Node and Express application that serves the following eight endpoints.
| method | route endpoint |
|---|---|
| GET | heroes |
| POST | heroes |
| PUT | heroes:id |
| DELETE | heroes/:id |
| GET | villains |
| POST | villains |
| PUT | villains:id |
| DELETE | villains/:id |
The structure of the Node Express app is straight-forward and contained in the server folder.
server
 | - routes
 | | - hero.routes.ts  👈 The hero routes
 | | - index.ts
 | | - villain.routes.ts
 | - services
 | | - data.ts         👈 The hero data (could be database API calls)
 | | - hero.service.ts 👈 The logic to get the hero data
 | | - index.ts
 | | - villain.service.ts
 | - index.ts
 | - server.ts         👈 The Express server
 | - tsconfig.json
The entry point is the server/index.ts file which runs the server.ts code to start the Express server. Then the routes (such as /heroes) are then loaded from the /routes folder. These routes execute the appropriate code in the /services folder. The data.ts file is where the app defines the data store configuration.
For example, when the client app makes a HTTP GET to the /heroes route, the route executes the logic in the /services/hero.service.ts file to get the heroes.
Feel free to explore the code for the Express logic in the server folder on your own.
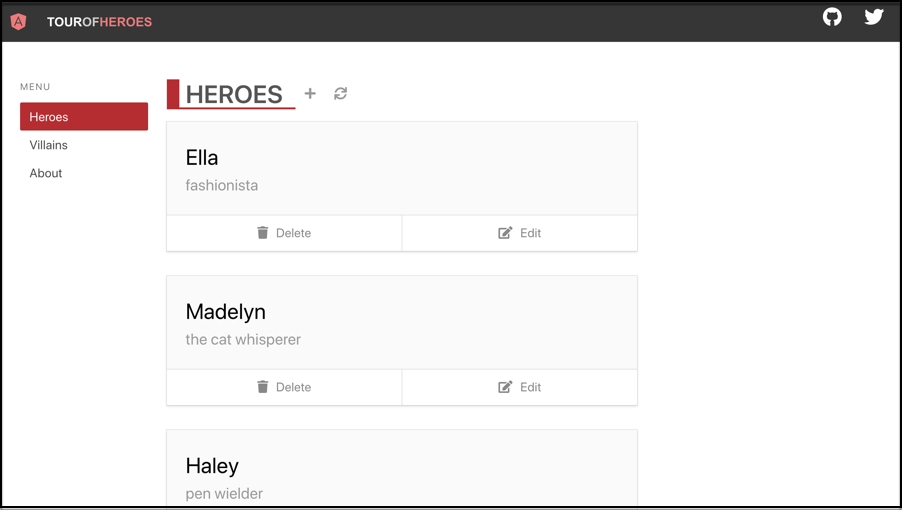
Here is a screen capture of the running application.
Run and Debug the Express App
When I want to become familiar with an app, I find it helpful to run and step through an app with the debugger. Let's do this together.
Let's start by opening the app in Visual Studio Code.
- Open proxy.conf.json and change the port to 7070 (our Express app)
- Open the VS Code Command Palette F1
- Type View: Show Debug and press ENTER
- Select Debug Express and Angular
- Press F5
- Notice the browser opens to http://localhost:7070
You may now set breakpoints in the Express and Angular code.
Here the debugger is stopped on a breakpoint in the Angular app.
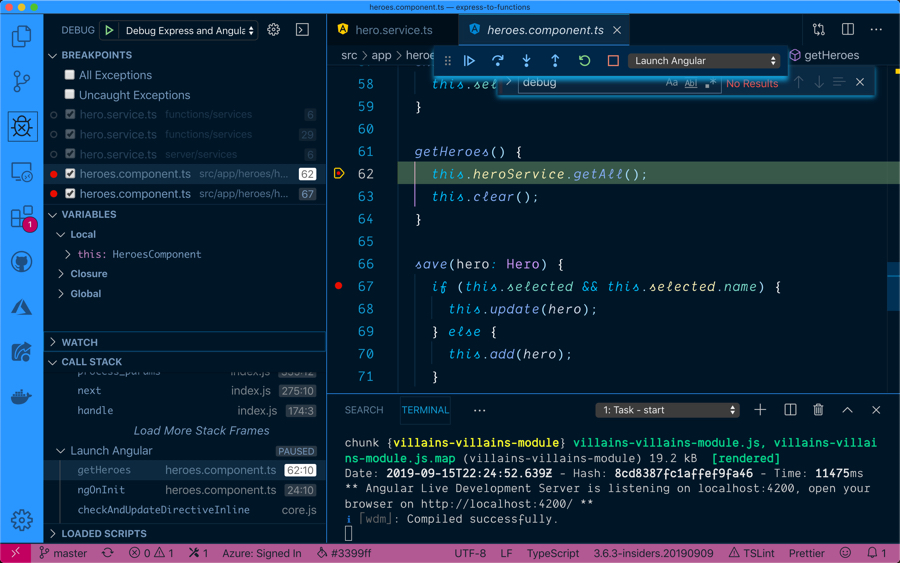
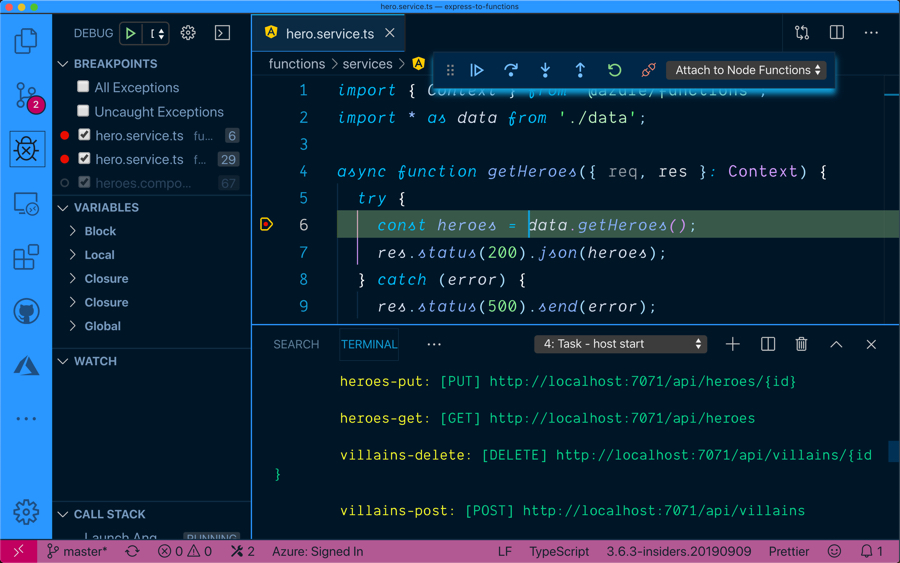
Here the debugger is stopped on a breakpoint in the Express app.

The files .vscode/launch.json and .vscode/tasks.json are integral to the debugging experience for this project. I encourage you to explore those files and copy/refactor their contents for your own purposes.
Making the Shift
Now that we've run the app and explored where we started with Express, let's plan the shift from Express to serverless. I like to solve problems by breaking them down into smaller problems. In this case, et's start by breaking down the Node Express app can be broken down into its three main areas:
- The Express server ( mostly in server.ts)
- The routes (routes/*)
- The data access logic (services/.service.ts*)
We'll take these one at a time as we make the shift for all of these. Let's start with shifting from the Express server to Azure Functions.
Express 👉 Azure Functions
The Express server runs the API on a server. You can create an Azure Functions project to run the APIs instead. I recommend using the VS Code Extension for Azure Functions. Once installed, follow these steps to create the Azure Functions on your computer.
- Open the command palette by pressing F1
- Type and select Azure Functions: Create New Project
- Choose Browse to find the folder to create the functions
- Create a new folder in your project called functions
- Select TypeScript
- When prompted to create a function, select Skip for Now
Congratulations, you just created an Azure Function app!
The Azure Functions app is what serves our routes.
Creating the function app in a functions folder helps separate it from the Angular and Express apps in the same project. You certainly don't have to put them all in the same project together, but for this sample it helps to see them all in one place.
Shifting Routes - Create Your First Function
You may recall that we have eight endpoints in the Express app. Follow these steps to create a function for the first of these endpoints. We'll come back and create the other seven endpoints soon.
- Open the command palette by pressing F1
- Type and select Azure Functions: Create Function
- Choose HTTP Trigger for the type of function
- Enter heroes-get as the name of the function
- Select Anonymous for the authentication level
Notice that there is now a folder functions/heroes-get that contains a few files. The function.json contains the configuration for the function. Open function.json and notice that the methods allow both GET and POST. Change this to only allow GET.
By default the route to execute this function will be heroes-get. The route in the Express app is simply heroes. We want these to be the same, so add a route: "heroes" entry in the bindings section in the function.json. Now the function will be executed when an HTTP GET on /heroes is called.
Your function.json should look like the following code.
{
  "disabled": false,
  "bindings": [
    {
      "authLevel": "anonymous",
      "type": "httpTrigger",
      "direction": "in",
      "name": "req",
      "methods": ["get"],
      "route": "heroes"
    },
    {
      "type": "http",
      "direction": "out",
      "name": "res"
    }
  ],
  "scriptFile": "../dist/heroes-get/index.js"
}
The other important file here in the functions/heroes-get folder is index.ts. This file contains the logic that runs when the route is invoked. We already have all this logic from our Express app. We'll go get that next.
Data - Shift the Services to Serverless
All of the logic that executes to interact with the data store is contained in the server/services folder of the Express app. We can lift that code and shift it over to the Azure Functions app and make a few small adjustments. This may seem like it wouldn't work, but let's consider what is different about the Express app and the Azure Functions app. Here are some main differences in the services.
- The Express app uses the npm package express while the Azure Functions app uses the npm package @azure/functions
- Express has
reqandresparameters representing Request and Response. Azure Functions puts these inside of acontextobject variable.
That is all we have to know. So armed with this information, it makes sense that we can copy the code for the services from the Express app to the Azure Functions app with minimal changes. Let's do this now.
Shift the Code from Express to Functions
Why write everything from scratch and throw away your hard work if you do not have to, right? Well, we can take the services code from our Express app and copy it to our Azure Functions app.
- Copy the server/services folder
- Paste into the functions folder
Now we have some minor refactoring to make the code work with Azure Functions instead of Express. The one thing that changes here is that the routing API and how request and response are passed. Let's refactor for this API difference.
- Open the functions/services/hero.service.ts file
- Replace
import { Request, Response } from 'express';withimport { Context } from '@azure/functions'; - Replace every instance of
(req: Request, res: Response)with({ req, res }: Context).
Your code will look like the following when you are done refactoring. Notice the places that changed are commented.
// 👇 This was import { Request, Response } from 'express';
import { Context } from '@azure/functions';
import * as data from './data';

// 👇 This was async function getHeroes(req: Request, res: Response) {
async function getHeroes({ req, res }: Context) {
  try {
    const heroes = data.getHeroes();
    res.status(200).json(heroes);
  } catch (error) {
    res.status(500).send(error);
  }
}

// 👇 This was async function postHero(req: Request, res: Response) {
async function postHero({ req, res }: Context) {
  const hero = {
    id: undefined,
    name: req.body.name,
    description: req.body.description
  };

  try {
    const newHero = data.addHero(hero);
    res.status(201).json(newHero);
  } catch (error) {
    res.status(500).send(error);
  }
}

// 👇 This was async function putHero(req: Request, res: Response) {
async function putHero({ req, res }: Context) {
  const hero = {
    id: req.params.id,
    name: req.body.name,
    description: req.body.description
  };

  try {
    const updatedHero = data.updateHero(hero);
    res.status(200).json(updatedHero);
  } catch (error) {
    res.status(500).send(error);
  }
}

// 👇 This was async function deleteHero(req: Request, res: Response) {
async function deleteHero({ req, res }: Context) {
  const { id } = req.params;

  try {
    data.deleteHero(id);
    res.status(200).json({});
  } catch (error) {
    res.status(500).send(error);
  }
}

export default { getHeroes, postHero, putHero, deleteHero };
There are four functions where request and response are parameters. One each for getHeroes, postHero, putHero, and deleteHero.
The parameters to every function in the Express app contain req and res. The Azure Functions app can still get to the request and response objects, but they are contained within a context object. We use destructuring to access them.
The Context object also contains other APIs, such as log (ex: context.log('hello')). This could be used in place of the common console.log you use in Node apps.
Refactor the Route
Now point your route to the service in your functions/heroes-get/index.ts file. Open that file and replace it with the following code.
import { AzureFunction, Context, HttpRequest } from '@azure/functions';
import { heroService } from '../services';

const httpTrigger: AzureFunction = async function(context: Context, req: HttpRequest): Promise<void> {
  await heroService.getHeroes(context); // 👈 This calls the hero service
};

export default httpTrigger;
The code that you add calls the asynchronous function heroService.getHeroes and passes in the context which contain the request and response objects.
Create the Remaining Functions
Remember, there are eight total endpoints in the Express app and we just created the first one. Now, follow these steps to create an Azure Function for the rest of the endpoints.
- Open the command palette by pressing F1
- Type and select Azure Functions: Create Function
- Choose HTTP Trigger for the type of function
- Enter the name of the function for heroes and villains. I recommend heroes-get, heroes-post, heroes-put, heroes-delete, villains-get, villains-post, villains-put, villains-delete)
- Select Anonymous for the authentication level
- Open function.json and set the method to the appropriate value of get, post, put or delete.
- In the bindings section, for the get and post, add a
route: "heroes"(or villains as appropriate) entry. - In the bindings section, for the delete and put, add a
route: "heroes/{id}"(or villains as appropriate) entry. - Add the code in each function's index.ts file to call the appropriate hero or villain service function.
Looking at the Functions App
The Azure Functions app now has folders that map to their appropriate endpoints as shown below.
| method | route endpoint | folder |
|---|---|---|
| GET | heroes | heroes-get |
| POST | heroes | heroes-post |
| PUT | heroes:id | heroes-put |
| DELETE | heroes/:id | heroes-delete |
| GET | villains | villains-get |
| POST | villains | villains-post |
| PUT | villains:id | villains-put |
| DELETE | villains/:id | villains-delete |
The structure of the Azure Function app contained in the functions folder should look like the following.
functions
 | - heroes-delete
 | | - function.json
 | | - index.ts
 | - heroes-get
 | | - function.json  👈 The hero route's configuration
 | | - index.ts       👈 The hero routes
 | - heroes-post
 | | - function.json
 | | - index.ts
 | - heroes-put
 | | - function.json
 | | - index.ts
 | - services          👈 The same folder that the Express app has
 | | - data.ts         👈 The hero data (could be database API calls)
 | | - hero.service.ts 👈 The logic to get the hero data
 | | - index.ts
 | | - villain.service.ts
 | - villains-delete
 | | - function.json
 | | - index.ts
 | - villains-get
 | | - function.json
 | | - index.ts
 | - villains-post
 | | - function.json
 | | - index.ts
 | - villains-put
 | | - function.json
 | | - index.ts
 | - .funcignore
 | - .gitignore
 | - host.json
 | - local.settings.json
 | - package.json
 | - proxies.json
 | - tsconfig.json
Debug Node Express and Angular
Now it's time to run the app and see if it all works! We'll do this through the VS Code debugger.
Just to keep things separate, we'll make sure the Express app uses port 7070 and the Azure Functions app uses port 7071. If we were truly removing the Express app (which we could absolutely do at this point) we could keep the same port. But for educational purposes, let's keep them both around
- Open proxy.conf.json and change the port to 7071 (our function app)
- Open the VS Code Command Palette F1
- Type View: Show Debug and press ENTER
- Select Debug Functions and Angular
- Press F5
- Open the browser to http://localhost:7071
You may now set breakpoints in the Functions and Angular code.
In case you missed it - the files .vscode/launch.json and .vscode/tasks.json are integral to the debugging experience for this project. I encourage you to explore those files and copy/refactor their contents for your own purposes.
Optional - Remove the Express App
At this point the Express app is no longer being used. Feel free to delete it (you can always re-clone the GitHub sample) or keep it around if you want to go back and froth between Express and Azure Functions.
Summary
The end result is we have Angular and Azure Functions. Now we can think about servers less (get it, because we are using serverless?).
Node and Express have been incredibly powerful and oft used for serving API endpoints. Now with serverless you could shift your APIs and not worry about server setup or maintenance, possibly reduce cost of an always on server, and replace the Express server with Azure Functions service. And for your efforts, you get an API that scales well and lets you focus on the code, not the servers.
If you want to deploy the Azure Functions app to the cloud, you can deploy it by following this tutorial. All you need is an Azure account and then use the Azure Functions extension for Visual Studio Code to deploy it.
The complete solution for the sample project is on GitHub here. The instructions on how to get started are also in the README file. You can explore running the Express app or the Azure Functions app to get a sense of the differences. Then try to apply this same shift to your code.
Resources
Here are a bunch of resources about the topics covered in this article.
VS Code
Azure Functions
- Azure Functions local.settings.json file
- Tutorial to Deploy to Azure Using Azure Functions
- Article about Azure Functions TypeScript Support


